If you are watching the video above (apologies in advance), its probably changed by now, since the Django framework is constantly updated by the dedicated community, so, you might want to follow the instructions where you can the most updated information. In many other tutorials, you might see that people are recommending installing a virtual environment though, but you can do this without it as well.
Simply, follow the instructions in the page, and you will be having a preoject setup to work on your own page.
TO CREATE A NEW PROJECT : NEW DJANGO PROJECT
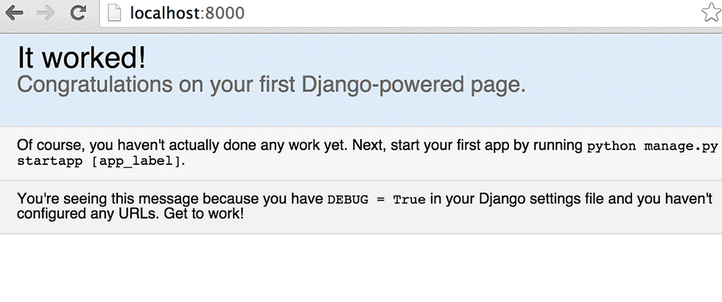
So, before follow any more instructions, make sure you see this on your browser :
Simply, follow the instructions in the page, and you will be having a preoject setup to work on your own page.
TO CREATE A NEW PROJECT : NEW DJANGO PROJECT
So, before follow any more instructions, make sure you see this on your browser :
Then as it says, it is working, you are hosting a default webpage running on your local python server.
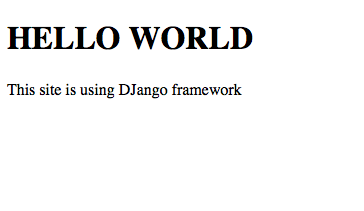
We can start by creating a basic html webpage without any CSS, that will say HELLO WORLD.
Now if you have already created the above project, then you already have a folder that has two files and one directory or folder.
1. db.sqlite3 (default database table created when you typed "python manage.py migrate")
2. manage.py (to manage the project works like a manager that tells what goes where)
3. mysite (is a foler that has __init__.py settings.py urls.py wsgi.py
__init__.pyc settings.pyc urls.pyc wsgi.pyc)
Now, to create an html page and display it on the server takes some easy steps, but most important steps are
#python manage.py startapp myapp (you can name anything you want, in this case it's myapp)
# Inside myapp folder, create a directory and name it "templates" (your webpages goes here)
# Go inside the templates folder and create a "index.html" file and copy and paste this code
<!doctype html>
<html>
<head>
<title>My first site</title>
</head>
<body>
<h1>HELLO WORLD</h1>
<p>This site is using DJango framework</p>
</body>
</html>
or you can go and customize it whatever way you want.
Next, In your myapp folder, you can see a file named "views.py" that is responsible to respond and "serve" the page that is defined inside the function.
Open the "views.py" file and copy and paste this code.
from django.shortcuts import render
def index( request):
return render( request, 'index.html')
Make sure you Indent the code correctly, otherwise it would not work! There should be four spaces before the return statement, according to the python syntax.
Then go mysite folder that you created previously. Inside the folder you will see a file named "urls.py".
Open the file using any text editor, add the following change as mentioned below and save the file.
from myapp import views
urlpatterns = [
url( r' ^ $', views.index, name =' home'),
url( r' ^ admin/', include( admin.site.urls)),
]
Here, views.index' means that we’ll use the index view in views.py in our app which is myapp. name =' home' is optional, but this allows us to assign a name to this URL so that we can refer to it as “home”.
Finally, open the settings.py and tell django that you have created a new app by providing it's name in the INSTALLED_APPS..
When you open the settings.py file you will see a section that looks something like this,
INSTALLED_APPS = (
'django.contrib.admin',
'django.contrib.auth',
'django.contrib.contenttypes',
'django.contrib.sessions',
'django.contrib.messages',
'django.contrib.staticfiles',
)
To add the name of your app, you just have to do this,
INSTALLED_APPS = (
'django.contrib.admin',
'django.contrib.auth',
'django.contrib.contenttypes',
'django.contrib.sessions',
'django.contrib.messages',
'django.contrib.staticfiles',
'myapp',
)
save the file and we are ready to display the index.html page on our browser.
Go to the directory where manage.py file is.
Then to run the server, type python manage.py runserver.
Then to see the webpage you, can type 127.0.0.1:8000 in the address bar of your browser.
After doing all the steps mentioned above, you should see the following page in your browser!
So, before you move on, make sure you remember the steps mentioned above, since these are the basic steps for any webapp in Django.
Google the codes, and read and go through some other examples to get familiar with the files and python language as well.
More is Coming! that includes, database setup, CSS styling etc..:)


